By using MyDirectPlan, creating your expenses is the first step on the road to reimbursement. Here is a quick guide for users who want to submit their Expenses via AI by attaching their receipt using the MyDirectPlan web application:
To do so, follow the steps below:
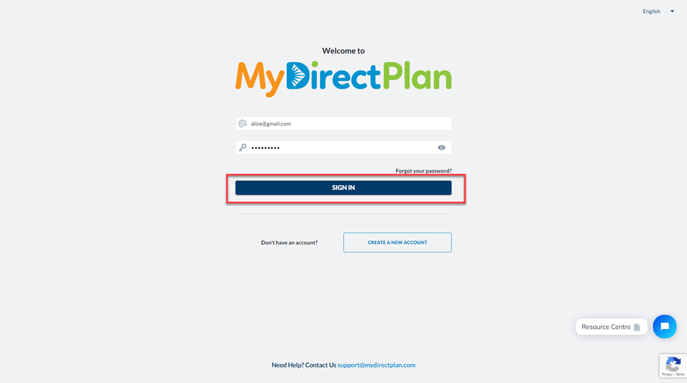
- Open your preferred web browser and navigate to MyDirectPlan https://mydirectplan.com/
- On the MyDirectPlan homepage, click on the "Sign In" button located in the header.

- On clicking, you will be taken to the Sign In page of the MyDirectPlan application.
- Sign in to your MyDirectPlan account.
- Select the recipient from the left-side menu for which you want to submit the Expenses.
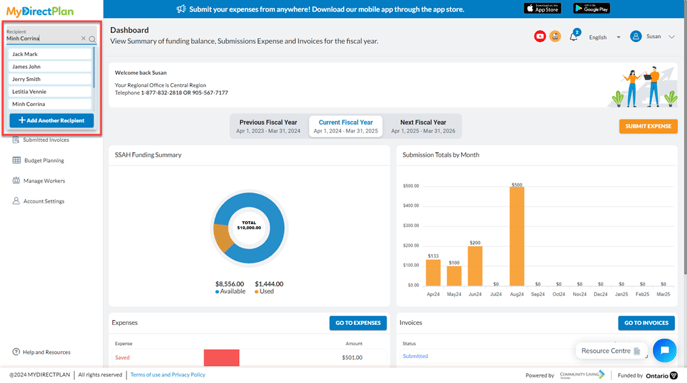
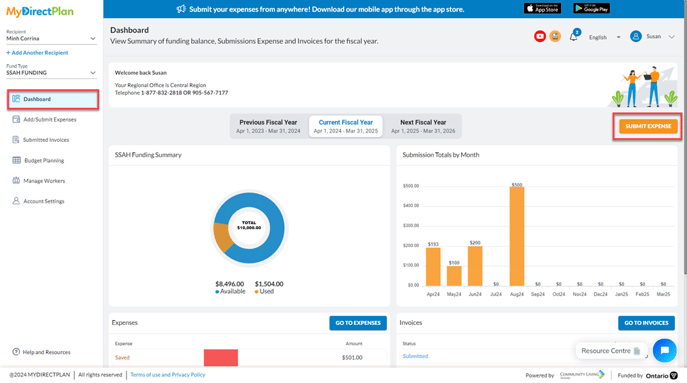
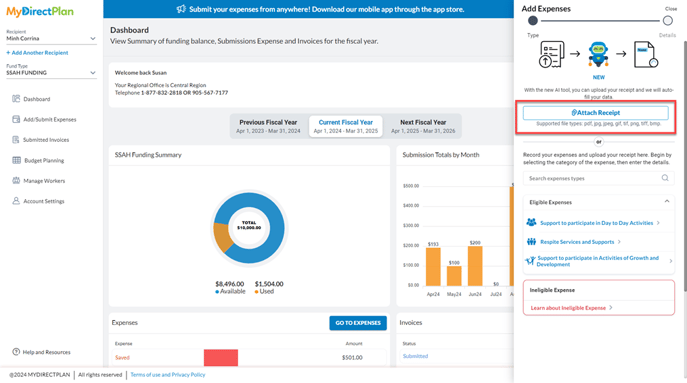
- Navigate to your “Dashboard” or “Add/Submit Expenses” section from the left-hand menu. If you are on the “Dashboard”, click the "Submit Expense" button.
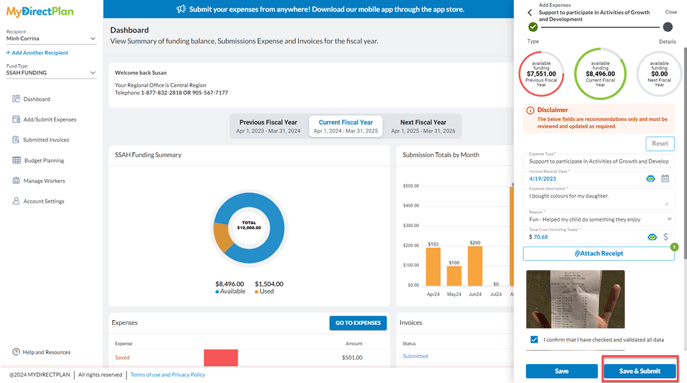
- This will open an "Add Expenses" wizard, allowing you to add your expenses via AI by attaching the receipt or manually entering by selecting your expense category from the list of new Eligible Expense Categories.
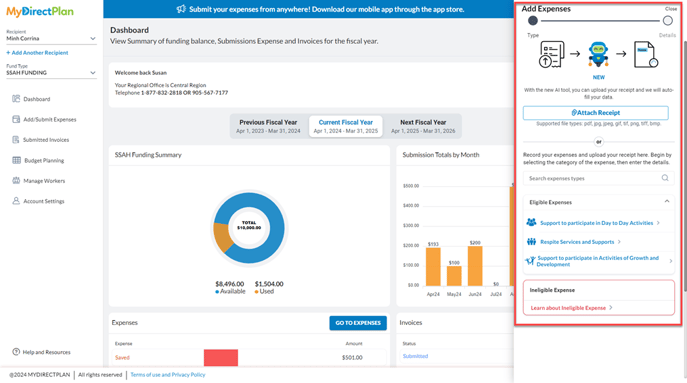
- Click on the "Attach Receipt" button and upload your receipt. Don’t forget to check the supported file formats before uploading the receipt. Supported file types include pdf, jpg, jpeg, gif, tif, png, tiff, bmp.
- Once you have uploaded the receipt, the AI tool will start its processing and extract the relevant information from the attachment. After extraction, AI will auto-populate the expense fields with the possible AI-extracted data. If the AI cannot classify the Expense Category, a disclaimer will appear, and it will prompt you to select the Expense Category manually.
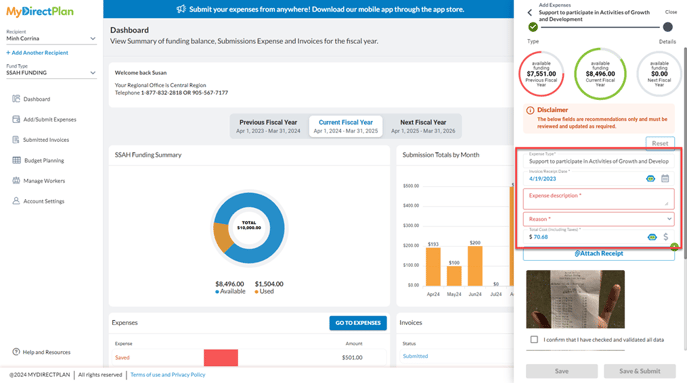
- At the top, you can view your Available Fiscal Budget for the current fiscal year, previous fiscal year, and next fiscal year to show you how much funds are available in your balance.

- You can also read a prominent Disclaimer, indicating that it is highly suggested to review the AI-extracted fields.
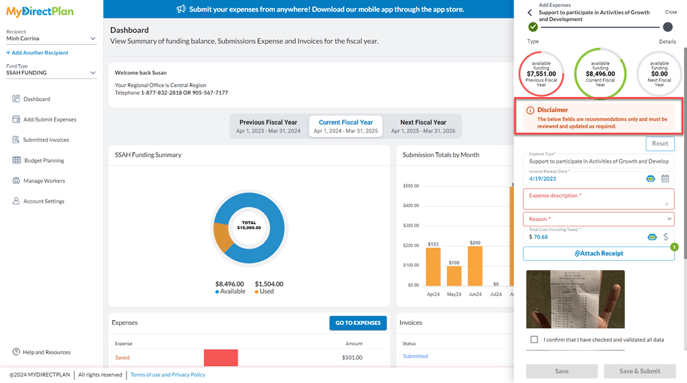
- In the new Expense form , all the fields are mandatory, including Attachments. Therefore, fill in the missing details for adding your expense, such as Expense Description and Reason.
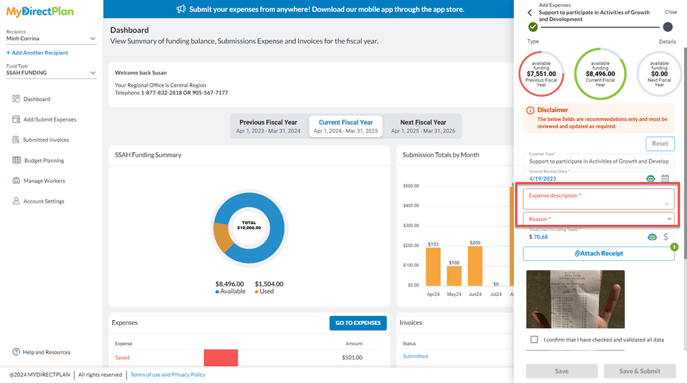
- Before saving an AI expense, you must certify that you have reviewed all the expense fields by selecting the checkbox.

- After certifying, click on the “Save” button if you want to submit your Expense later. By clicking on the “Save” button, the application will save your expenses in your “Add/Submit Expenses” section.
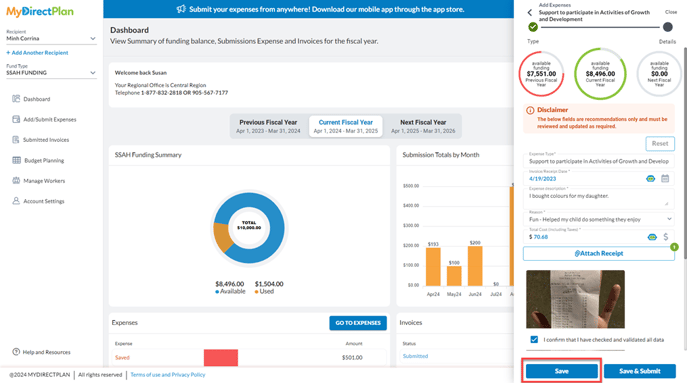
- If you want to submit your expense right away, click on the “Save and Submit” button and follow the prompt to submit your Expense to your Regional Office.
Congratulations! You have successfully Saved and or Submitted an Expenses using AI.
Still need help?
Thank you for using MyDirectPlan. If you still have questions, you can contact our support team by emailing us at support@mydirectplan.com or scheduling a call. Our team is available on weekdays from 10-6 EST.