This article is for:
- Passport Agency Staff Users
In this article:
- Manage Recipients Feature (Overview)
- Adding New Recipients to your MDP Account
- Assigning Recipients to Staff Member(s)
- Viewing and Editing Recipient Information

In this menu, you will be able to search and view details for each Recipient with an MDP account who is served by your Agency.
Please note: As part of the onboarding process, Community Living Toronto’s team will partner with you to plan, prepare for, and carry out all the necessary data migration/entry process.
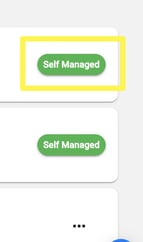
For Recipients who already have MDP accounts, their names and details will automatically be pulled into this menu. These Recipients will be indicated by the additional “Self-Managed” label beside their contact record.
For Recipients who are being served by your Agency but who do not yet have an MDP account, you will be able to create a new record for them in MDP either manually or through spreadsheet upload. Follow the instructions in the next section below to learn how to do so.
Adding New Recipients to your MDP Account
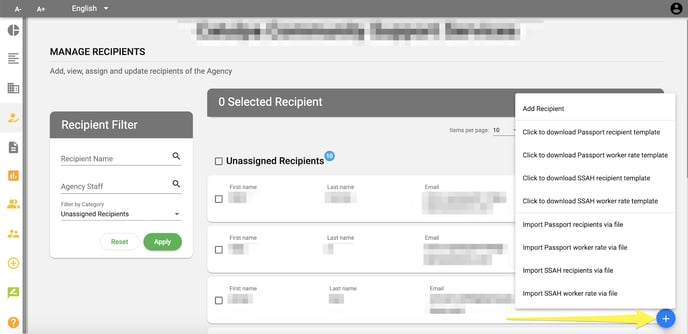
Click the blue + icon in the bottom right. You will have many choices:
- Click “Add Recipient” to manually add new Recipients to your account individually.
- Click one of the “Templates” in order to download a spreadsheet file with pre-set columns that can help you with bulk-uploading Recipients.
- Click the appropriate “Import” button in order to upload the new file you’ve created with the appropriate new Recipient Data.
Assigning Recipients to Staff Member(s)
If your Agency would like to delegate responsibility of specific Recipients to specific staff members, this can be done within this menu. This is optional.
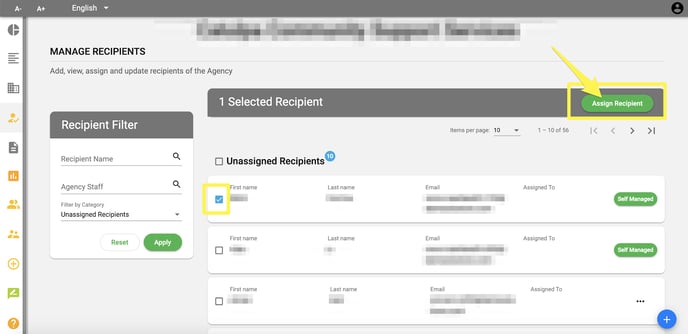
If necessary, use the Filter tool on the left to help find the right Recipient. Select the checkbox beside the Recipient(s) you would like to assign. Click the “Assign Recipient” button.
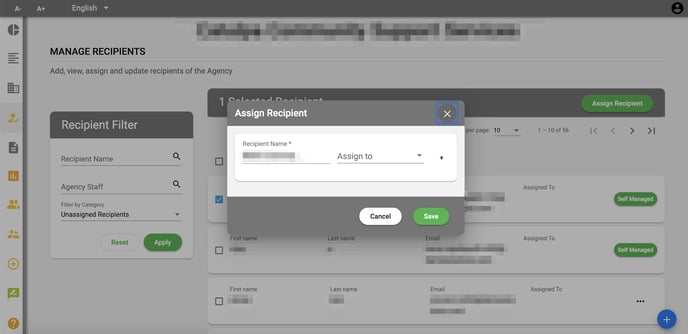
In the popup menu, select the staff member users you would like to assign to the Recipient(s). Recipients can be assigned to one or more Staff Members.
Viewing and Editing Recipient Information
You can view each Recipient’s information and account settings by clicking on that person’s name.
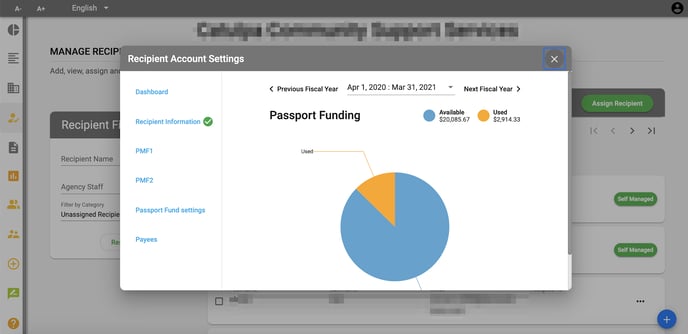
In the popup menu, you can view that individual’s funding allotment and usage, as well as make edits if necessary to that Recipient’s personal information.
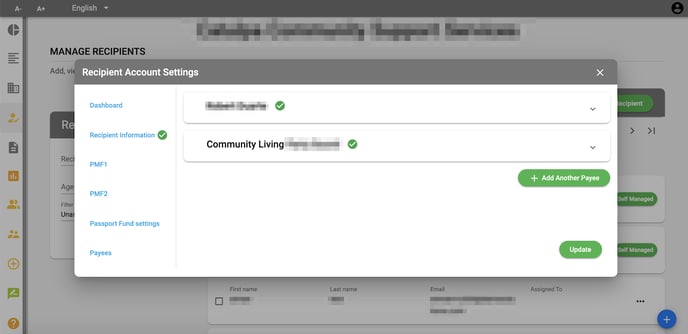
The green circle icon with a checkmark indicates that this information has been verified. Any new edits that are saved will be updated in the system instantly.
Please note: Agencies can also be added as Payees if preferred.
